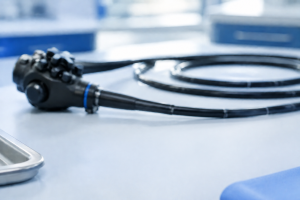
A stress relief boot protects the transition where a flexible cable or tube meets a more rigid connector or housing. In flexible endoscope systems, this transition experiences repeated bending, pulling and handling. When the boot loses support, movement becomes concentrated at one point and may accelerate damage to the components beneath it.
This guide helps repair centers recognize stress-relief concerns and prepare a more accurate compatible-part inquiry. It does not replace the manufacturer’s instructions for use (IFU), service documentation or model-specific acceptance limits.
What a Stress Relief Boot Does
A correctly fitted boot spreads bending over a controlled distance instead of allowing a sharp fold at the connector. It can also reduce abrasion and provide an external barrier around the transition. Its length, flexibility, bore, end geometry and attachment method must work with the surrounding assembly.
The boot should not be treated as decorative trim. A replacement that is too stiff can shift stress farther along the cable, while one that is too soft may provide insufficient support. Visual similarity alone does not prove compatibility.
Common Signs of Wear
- Cracks, splits or surface cuts near the narrow or wide end.
- Permanent bending, flattening or a sharp kink at the transition.
- Hardening, swelling, tackiness or discoloration inconsistent with the approved condition.
- Separation from the connector or movement where the boot should remain seated.
- Abrasion marks, exposed underlying material or an uneven edge.
- Repeated cable flexing at one concentrated point during normal handling.
Inspect the surrounding cable and connector as well. Boot damage may be a symptom of pulling, incorrect routing, chemical exposure, impact or a previous assembly problem. Replacing only the exterior boot without correcting the cause can lead to repeat failure.
How to Inspect the Transition
Clean and prepare the device according to the applicable procedure before inspection. Under suitable lighting, examine the boot while it rests naturally. Do not force it through an extreme bend merely to make a crack visible. Check the full circumference and both transitions.
Observe how the assembly bends through the permitted range. The curve should remain smooth without a localized hinge point. Stop if movement creates abnormal resistance, opens a split or exposes an underlying component. Damaged devices should be removed from service and handled under the organization’s repair and reprocessing controls.
Measurements to Record
For a parts inquiry, document overall length, outside diameter at defined points, bore or cable diameter, large-end and small-end geometry, shoulder positions and orientation features. Flexible elastomeric parts can deform under measuring pressure, so use a controlled method and appropriate tools.
Selecting a Compatible Replacement
Start with the exact manufacturer and endoscope model. Specify the location of the boot and provide clear photographs of the complete transition, both ends and the removed part. Ask the supplier to confirm compatibility with the stated model and whether adhesive, sleeves or other fittings are included.
Do not trim, drill, stretch or heat a near-match to make it fit unless an approved model-specific procedure allows that action. Modifying the part can change its support characteristics and attachment security.
Installation and Final Checks
Qualified personnel should install the boot using the documented materials and sequence. Protect adjacent cables, channels and seals from heat, tools and chemicals. Confirm seating, alignment and a smooth transition before completing required functional, leak, electrical-safety and reprocessing checks.
A boot that looks correct but moves, twists or concentrates bending should not be accepted. Record the supplier, lot and installed part in the repair history.
Preventing Repeat Damage
Review how the assembly is handled, transported and stored. Tight coiling, pulling by the cable, unsupported connector weight and storage against a sharp shelf edge can all concentrate stress. Use approved supports and handling methods, and train staff to lift the assembly by its intended grip points.
Trend repeat failures by model, location and repair history. If several boots fail in the same way, investigate routing, installation materials, supplier dimensions and user handling instead of treating each event as an isolated cosmetic defect.
Frequently Asked Questions
Can a cracked boot be covered temporarily?
Improvised tape or sleeves may hide damage and change flexibility. Follow the manufacturer’s instructions and the repair center’s approved disposition process instead of making an undocumented temporary repair.
Does boot damage always mean the cable is damaged?
No, but the underlying cable and connector should be inspected because they may have experienced concentrated movement, abrasion or contamination.
Can boots with similar dimensions be interchangeable?
Not necessarily. Material, stiffness, taper, end geometry and attachment method may differ. Compatibility should be confirmed for the exact model and position.
Conclusion
Stress relief boots help manage movement at vulnerable transitions. Early inspection, accurate measurements and model-based sourcing can prevent a small exterior defect from becoming a larger cable or connector problem. Browse Endopart’s endoscope spare parts or contact Endopart with the model and photographs.